Recording Options
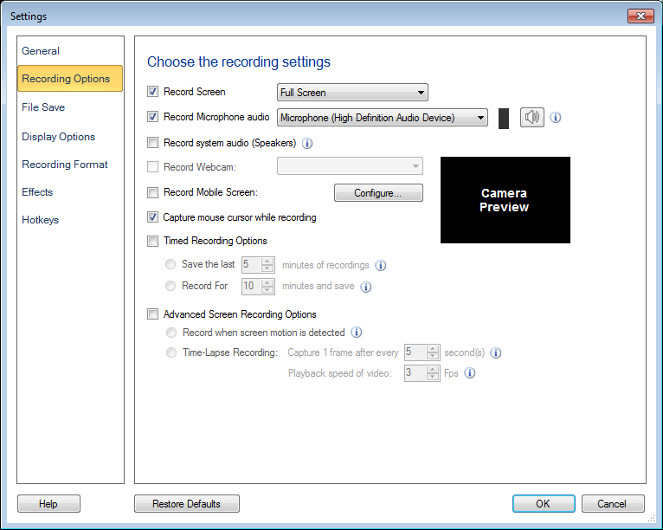
Click Tools >> Settings >> Recording Options to enable the following features:

Record Screen Capture
Click and know in detail about all the different ways to Record Screen.
Add Audio Narration to your Screen Recording
Multimedia presentations typically involve two factors: sight and hearing. When the video and audio are synchronized in a presentation, the content is better understood.
Add audio narration to your screen recordings to make presentations and tutorials more interesting. Use a microphone to add your own audio narration to demonstrate any application or website.
To Select the Audio Recording Device
You must setup a Microphone to record your narration with the video. Use Record Microphone Audio option and select the respective Microphone from the Audio Recording devices dropdown list. Make sure that the Microphone is enabled as your audio recording device.

Recording a voice narration as you capture is perfectly appropriate, such as when you're making a quick "how to". In order to create professional presentations, make sure your script for the narration is ready before you start the recording.
You can also include the sounds from the computer speakers. For example, if you want to capture your favorite music playing on the PC during your screen recording, you can select the speakers. Recording the audio from the microphone along with the speakers, allows you to record internet chat or any multimedia applications and add your own narration to it.
Recording Video without Audio
You can choose to record the screen activity without audio. Eliminating audio from your screen recordings results in smaller file sizes.

You need to uncheck both Record Microphone audio and Record system audio (Speakers) option to record your video without audio.
Record Webcam
My Screen Recorder Pro allows you to capture Webcam image during Screen Recordings. Select Record Webcam checkbox or directly use Hotkey associated with a webcam and a webcam window will appear on the Desktop. Customize the size and position of the Webcam window and capture interactive videos by adding your face to the presentations.
Record Mobile Screen

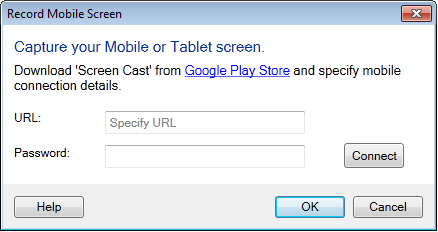
My Screen recorder pro allows you to capture your mobile screen during recording. To use this feature, you will need to install Screen Cast application on your mobile device. Get it now from play.google.com/store. Select Record mobile screen checkbox and configure the settings by providing URL from Screen Cast application. Use hotkey to cast your mobile to your PC screen. You can customize size and position of mobile screen preview window on your PC.
Capture Options
When you record the screen, the mouse cursor is captured by default. You can use the mouse cursor to highlight text or to point at the items while making a presentation, tutorial, or demonstration. If you do not want to capture the mouse cursor, disable it by deselecting the option Capture mouse cursor while recording.
Timed Recording Options

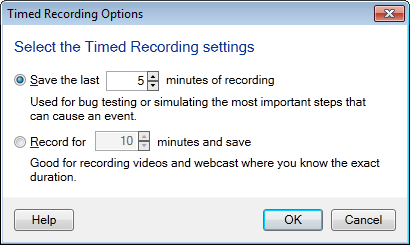
In some cases you may not need the entire recording. Your requirement is only a few minutes of the last part of the recording. Save only the last few minutes of your recording, by specifying the number of minutes, in the Save the last "x" minutes of recordings option.
If you want to limit your recording time duration then you can check Record for x minutes and save check box. Select a timing and the My Screen Recorder Pro will stop recording automatically after set time has reached.
Advanced Screen Recording Options

- Record when screen motion is detected: If motion detection recording is selected then My Screen Recorder Pro will watch your PC screen, selected application window or capture region for any change. For example, if a window is selected for recording then recording will start when any change or movement occurs in the window. If motion is not detected then recording will be automatically paused and the application goes into monitoring mode.
Different recording state indications, when motion detection recording is enabled
When you start recording, the application window minimizes. While the recording is in progress the My Screen Recorder Pro icon in the Taskbar and windows Notification area flashes continuously. When movements are not detected the My Screen Recorder Pro icon stops flashing as shown below:

Note - Audio capture is disabled during motion detection recording. Motion detection recordings will be always created with 5 fps, regardless of any selected frame rate. You can also run the application in background and use motion detection recording and Time-lapse recording.
- Setting up Time-Lapse Recording: Continuous recording captures a lot of unnecessary footage. With time-lapse feature enabled, you can capture frames at predefined time intervals. When you playback your recording, time appears to be moving faster and thus lapsing. For example, one frame may be captured every second, and played back at 30 frames per second. The result would be an apparent increase of speed by 30 times.
Note - Audio capture is disabled during Time-lapse recording. If you need to add audio narration, you can do it after the recording process.
|