Creating Photo Slide Shows Using Auto Movie Creator
Taking a picture is a great way to save shared memories with your friends and family. Today, most of us take pictures with digital cameras, and instead of paper photographs, we get digital files. Auto Movie Creator can turn a collection of digital photos into a high-quality slide show with only a few clicks.
This article will explain how to create a slide show using Auto Movie Creator. There are 5 easy steps:
- Choose pictures for the slide show and import them into the program.
- Add the photos to the Storyboard.
- Add a standard Transition Effect
- Add a musical score
- Export your slide show as a movie file.
You'll need some pictures from your digital camera on your computer.
Start Auto Movie Creator. When you start the program, it will open to the Video And Pictures Collection. To add your photos to the collection, just click the Add button ( ) and navigate to the folder you stored your photos in. To add all the photos in a folder at once, click on any file in that folder, then press Ctrl-A. All the files will be selected. Now, click the Open button. All the photos will be added to the Collection.
At this point, you need to decide how long each image should stay on the screen during the slide show. You can set the duration for the photos from the program's Options. Open the Tools menu and choose Options, or click the Options button in the toolbar
( ). The Options window appears.
The Image Sources setting determines how long each picture will stay on the screen. It's a good idea to set each image's duration about one second longer than you think is necessary, because transitions (which we'll discuss below) take up about that much time.
Once you have added all the photos to your Project, adding them to the Storyboard is very simple. Right-click on any blank area in the Video and Photos Collection (not on a photo) and from the menu choose Select all. All the photos are now selected. Now, right-click on a photo and choose Add to storyboard. All the photos are added to the Storyboard.
You can rearrange the photos simply by dragging them to new positions. Instructions for arranging clips are in the Working With Clips section of the program's User Guide. Delete any pictures that you decide you don't want in the slide show, by selecting them and clicking the Remove  button in the toolbar.
At this point, play your movie by clicking the Play button in the Preview window. You'll see the pictures appear on the screen, one by one. You may find it jarring how each picture instantly replaces the last one, with no pause or transition between them.
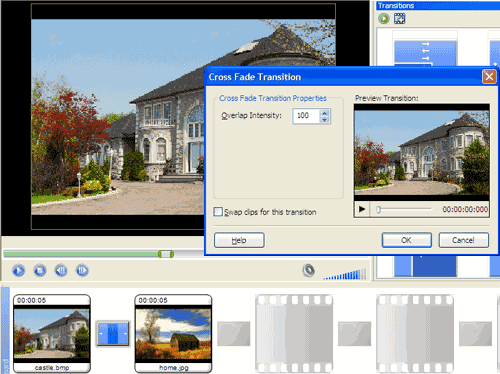
To smooth the exchanges between images, and make the slide show look more professional, we'll add a transition effect between each pair of images. A good transition for slide shows is the Cross Fade. We'll place a Cross Fade transition between all the slides.

First, right-click on any image in the Storyboard and choose Select All. Click on the Transitions  button in the Toolbar, locate the Cross Fade transition in the Transitions Collection, rightclick on it, and choose Add to storyboard. Every transition cell in the Storyboard is now filled with a Cross Fade effect.
Play your movie again. With the cross-fading between the images, it looks much more polished.
Only one more touch is necessary to create the perfect slide show: a musical score. To add a score, click the Music button in the Toolbar. To add a song to the Music Collection, click the Add button ( ) and navigate to a music file. If your slide show is long enough, you may need two or more songs. You can also repeat one song for the whole slide show.

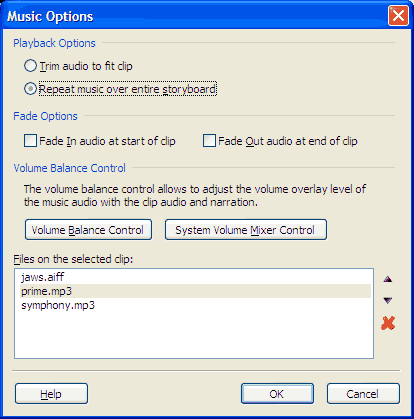
Once your song is in the Music Collection, drag it to the first clip in the Storyboard. The Music Options window appears. For a slide show, always choose to Repeat music over entire storyboard. You can use the up and down arrow buttons to change the order in which your music files play.