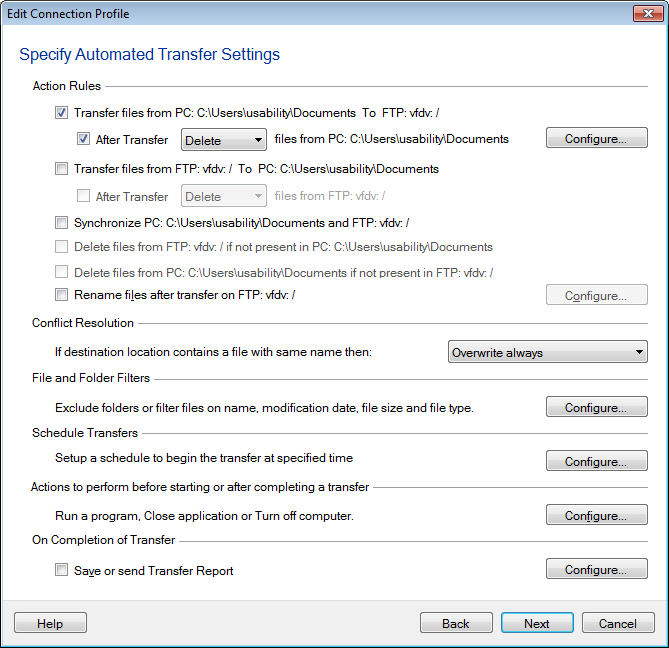
Automated Transfer Rules tells Auto FTP Manager what operations to perform while executing an Automated Profile.
While creating a profile, define all the rules and let Auto FTP Manager execute the profile according to these rules. In the Automated Transfer rules, you can:
To add different Automated Transfer Rules to your automated transfer profile, right click the profile and select Edit Connection Profile >> Transfer Rules. You can specify any or all of the following Action Rules:

In an Automated Transfer Profile, Action Rules tells Auto FTP Manager what operation to perform and to which location.
If the option Transfer files from <Folder 1> To <Folder 2> is checked then all files present in Folder 1 are transferred to Folder 2. You can even choose to Delete files from <Folder 1> After Transfer or Move the files to different location of your choice. You can choose to delete specific files after transfer.
The rule Transfer files from <Folder 2> To <Folder 1> transfers files present on Folder 2 to Folder 1. You can choose to Move the files that are transferred to another folder by clicking the Location button. If you do not require the transferred files anymore, Check After Transfer option and select delete option from the dropdown.
When you run an automated profile with Synchronize <Folder 1> and <Folder 2> option, it makes sure that the files present in both the folders are exactly same. If the files are not present in one folder then they are transferred from the other folder. This option is automatically selected when you check both the previous action rules.
You can have Auto FTP Manager delete files from the target folder if they are not present in the source folder. For instance, if Folder 2 contains a file named "Extrafile.txt" which is not present in Folder 1, then selecting the option Delete file from <Folder 2> if not present in <Folder 1> deletes the file Extrafile.txt when you run the Automatic Transfer Profile.
The rename rules changes the file name on destination <Folder 2> after transfer as per the configured rules. All the selected rules will be applied to filename sequentially.
Note: <Folder 1> and <Folder 2> will be replaced by your computer's name and the IP address of the server. You must note that the actual names of <Folder 1> and <Folder 2> will be used by the program.
Suppose, you want to transfer a file from your PC to the server. If the file is already present on the server, there will be a conflict. Auto FTP Manager has a way to resolve this conflict easily with the help of Conflict Resolution rules.
Auto FTP manager provides the following conflict resolution options for files:
Note: Same Conflict Resolutions will also applied to the location you choose to move files after transfer.
To prevent some files and folders from transfer, you can exclude them or add filters on Modification Date, File Size, File Name and File Type.
With Auto FTP Manager, you can schedule sets of transfers to run anytime you wish. Schedule each profile to start transfer automatically, either on a Daily, Weekly or Monthly schedule, for a one-time event, automatically on program launch or on Folder Change.
You may want a specific action to be executed before or after a file transfer. You can configure actions such as run a particular program, close the application or turn off a computer.
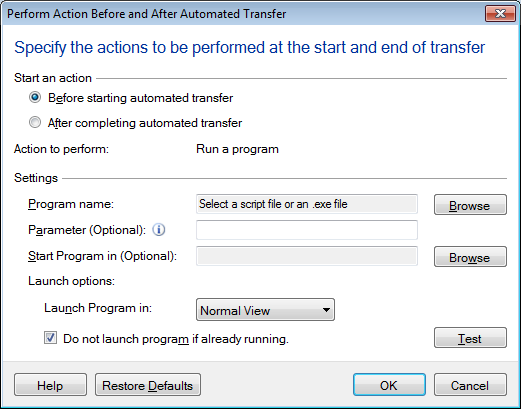
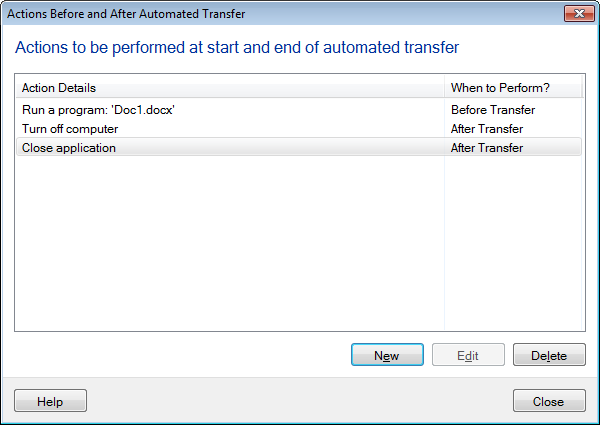
You can view the execution status of all the configured actions. Configured actions and time of execution will be shown as below:
Once the Automated Profile is executed, you can set Auto FTP Manager to perform following operations:
When you click configure, the following dialog will open:
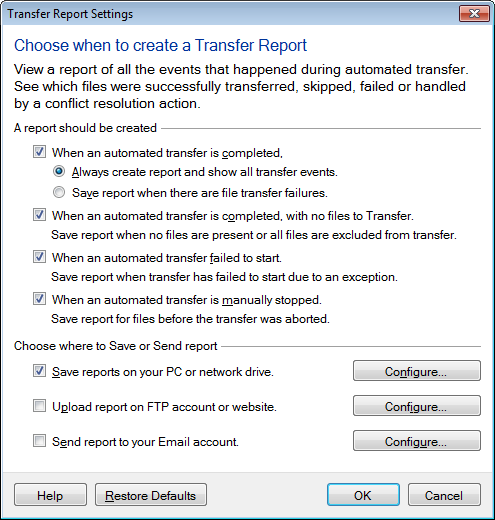
You can choose to save every report or just the one that was created when a file transfer failure occurred. Save location: Decide the location for saving the Transfer reports. You can choose any one or all of the following locations
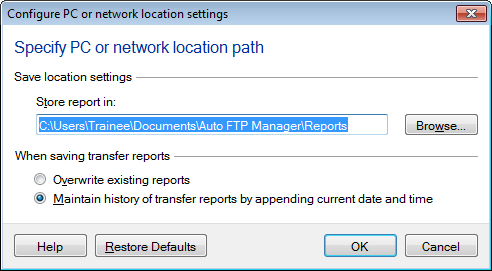
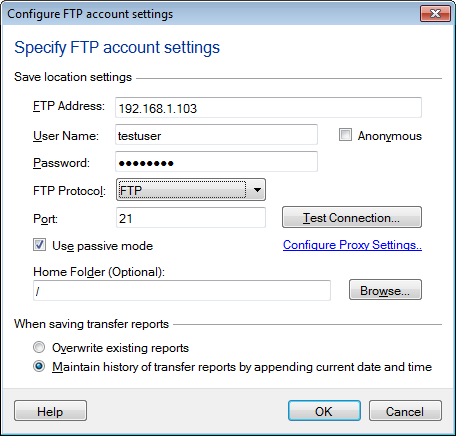
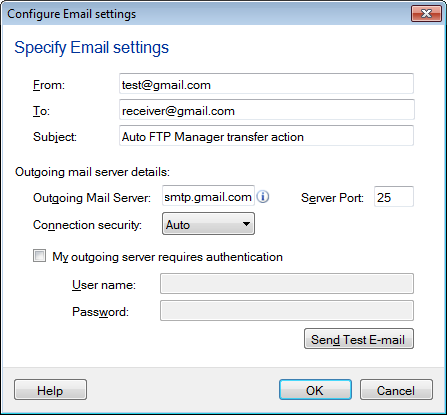
When saving transfer reports If you transfer files more frequently and are interested only in the latest transfer report, then choose the option Overwrite Transfer reports. Every time you perform automated transfer actions, the previous report is replaced with the new one. You can keep a track of all the reports by not deleting the previous one. Enable the option Maintain history of Transfer reports by appending current date and time.