Positioning your Microphone
The microphone needs to be positioned correctly for optimum speech recognition accuracy. If the microphone is positioned too far away, the recognition accuracy may deteriorate. Take into consideration the following points:
-
Make sure that the microphone is positioned about an inch away from your mouth.
-
Speak clearly and do not rush.
-
Speak in a quiet environment.
-
Do not breathe directly into the microphone.
-
Make sure that your microphone is not set to mute.
-
Position the microphone at the corner of your mouth and not directly in the front.
Select and Test Your Microphone

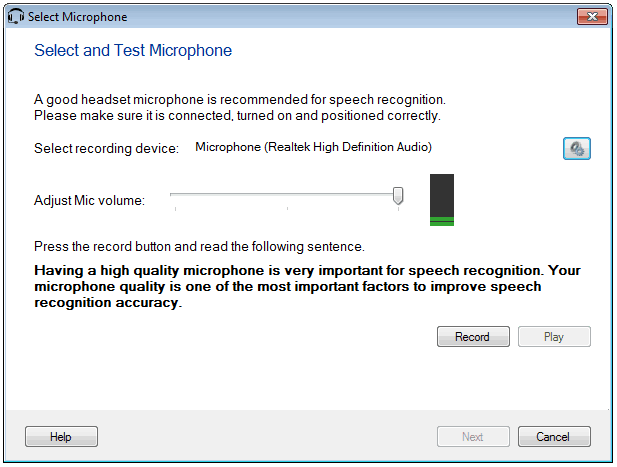
You need to select a good headset microphone for speech recognition. Make sure that a microphone is connected to your computer and is enabled. On connecting a microphone, you see the sound bar increases. The name of your microphone is displayed. If you do not see the name and the sound bar, click the sound settings icon  to open the Sound dialog. to open the Sound dialog.

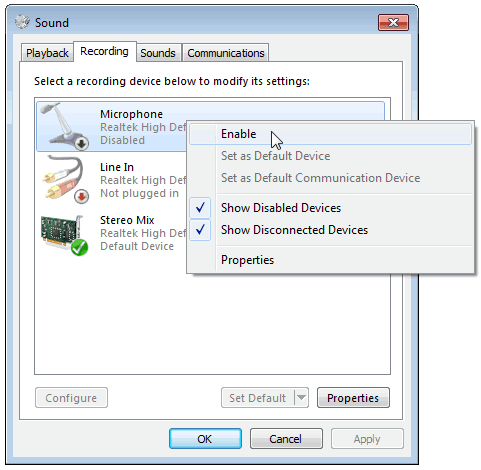
In the Sound dialog, check if your microphone is shown in the list. If it is displayed, right click on it and select enable.
At times even after enabling, the sound devices may not work properly. You may need to update the sound drivers for the devices. When your sound drivers are successfully updated you can again follow the above steps.
Once you select your microphone and see the sound bar increase, click the Record button and read the message that is displayed in bold. When finish reading the text, click the Play button to listen to how you sound. You may then verify speech and volume. You can adjust the volume to a desired level with the help of slider.
|