Recording Audio Without Video
You can easily record the sound coming from a Windows PC even if you don’t have a Stereo Mix option on your PC. This will help you to record game sounds, memos, interviews, etc. from your PC. Prepare your own audio books with the help of a microphone. Save your audio files in WMA, WAV, and MP3 formats and play them back whenever you want on your PC or any playback device.
Click Tools >> Audio Recorder and select the audio recording device.
Select an Audio Recording Device, either Microphone or Speakers. If you select Speakers, the audio played by your PC is recorded.
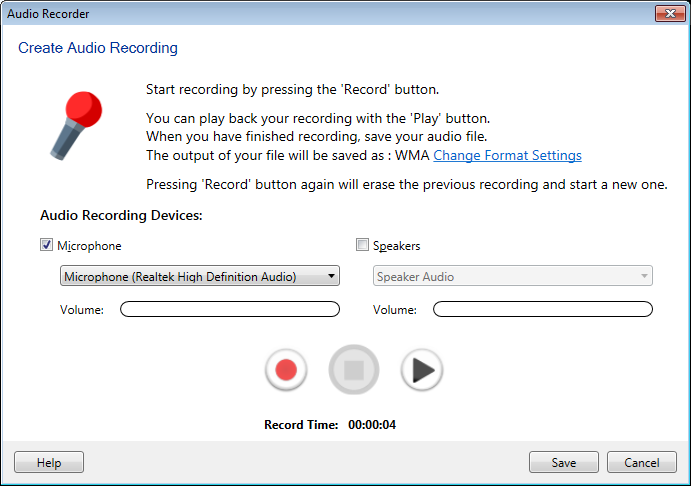
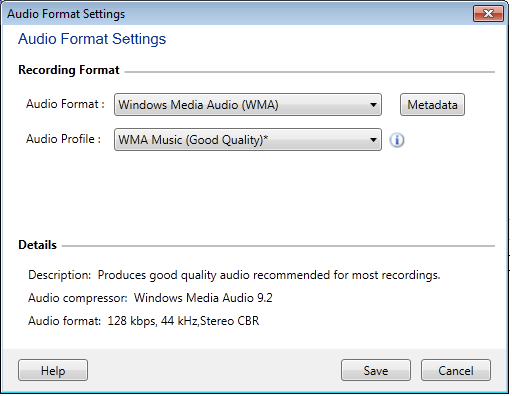
Select an Audio Format for your files. Windows Media Audio (WMA) and MP3 produces smaller files than WAV for the same quality, but may not be compatible with all players.
Select an Audio Profile. Generally, the lower quality settings are sufficient for voice-only recording, while the higher quality profiles should be used if music is being recorded. You can create your own audio profile by selecting the Custom Profile option from the dropdown list. Custom File Formats are available for WMA and MP3 recording.
Adjust recording volume using the slider. Create your audio recording using the Record/Pause, Stop and Play buttons. Use the Play button to check the recorded file. Select a name for your audio recording, and choose a folder to save it in.
|