It is easy to configure
Auto FTP Manager to automatically download files from a server and delete the files from the server after downloading.
Here are detailed instructions:
1. Click on 'New Profile' icon from the toolbar
2. Select the Type of Transfer and select
Automated Transfer Profile for a type of connection. Click Next.
3. In the case of PC Folder to FTP server profile: Enter PC folder location and click Next. Then enter FTP connection details like FTP address, username, password, port number and enter root folder location. Click the Next button.
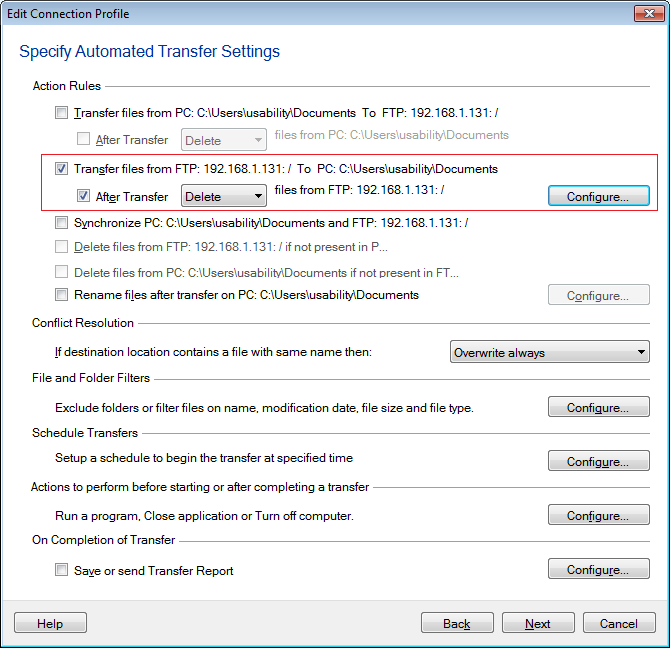
4. From 'Action rules' select 2nd checkbox for 'Transfer files from {FTP server name} to {PC_Path} and uncheck other checkboxes if any are selected.
5. You will see an option for 'After Transfer', select 'Delete' from the drop down.

6. Click on 'Configure' button for 'Schedule'.
7. Create a schedule as per your requirement (One time, daily, weekly, monthly, on application launch or on folder change) and save it.
8. Click on Next button, enter the profile name and click on 'Finish' button.
Now when schedule runs, the files will be downloaded from the server and deleted automatically after the download is completed.
Learn more about Action rules by reading
Use FTP Software to Automate File Upload / Download

