Use the scheduler feature to download files automatically using
Auto FTP Manager.
The first step is to
create an Automated profile to transfer files from your FTP server and the second step is to create a schedule for that profile.
To create an automated transfer profile, click
File >> New Connection Profile. Select the connection profile type as
Automated Profile. Enter the FTP details such as FTP address, port number, username and password. Navigate to the next page, look for the
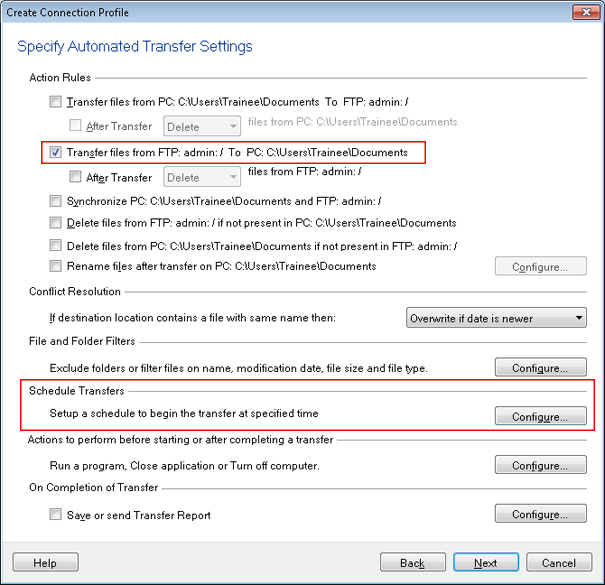
Action rules section and select the transfer action to download to your PC.

In the
Schedule Transfers section, click on the
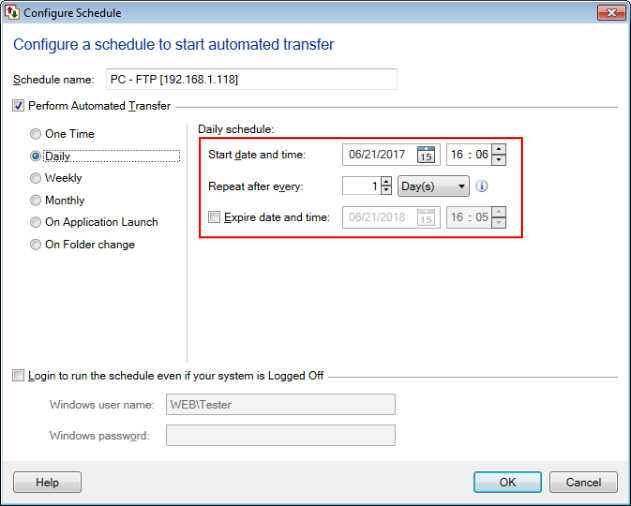
Configure button. You can select a daily or weekly schedule. The
Daily schedule will download files every day. In the
Weekly schedule you can select particular days of the week for transfer. Set the start date and time for the schedule. After creating the schedule, click on the
Next button, and enter a Profile name to finish the settings.

Once complete, the schedule will run at the configured time and files will be downloaded from FTP server automatically.

