|
Media Analyzer
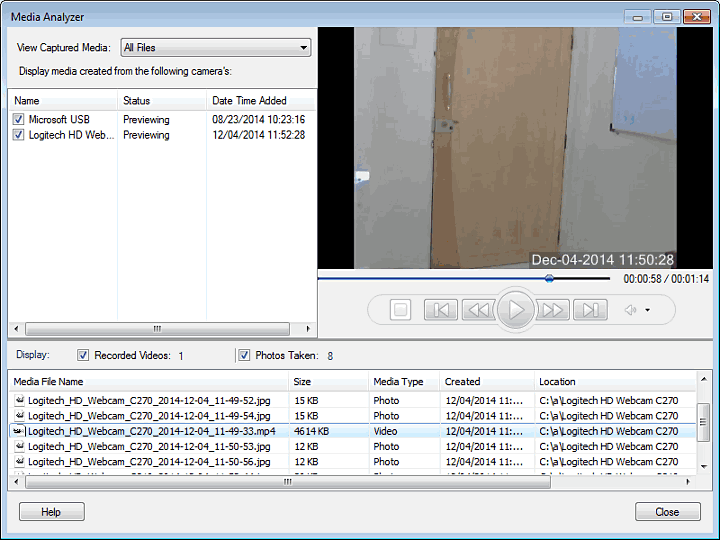
Webcam Monitor allows you to have a quick view of the captured media files of all the cameras.
Click Tools >> Media Analyzer or the Media Analyzer Icon on the Toolbar.


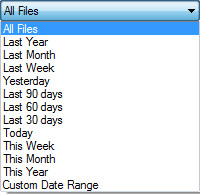
View Captured Media: This option allows you to view the files between the selected range, from the drop down list. By default, the All Files option is selected. You can select any of the following option from the drop down:

To select the Date range from the Calendar view, select custom date range. This will help you in case you want to see videos of specific duration.
Display media captured from the following camera(s): This section displays a list of camera Names along with their Status and the Date and Time they were added.
Display Media created from following cameras: In this section, the media files are listed according to their Name, Size, Type, the date and time they were Created and the Folder that stores the files. By default, the Recorded Videos and Photos Taken options are checked. You can specify to list either the videos or the photos by un-checking one of the options.
Preview Window: The Preview Window allows you to play your video recording as well as view the captured photos that are present in the files list. The Preview Controls allows you to manage the playback of your video recordings. You can Play/Pause, Stop, Rewind or Forward the recordings.
Preview Controls:

- Play or Pause: Click the Play button to start watching your recording in the preview window. Play will toggle with Pause. Pause button stops playing the video and the slider will be stopped at the current point.
- Stop: Stops the currently playing video and brings the slider to the beginning.
- Previous or Next file: You can choose to play the immediate next or the previous Media file from the File list with Next File and Previous File button.
- Seek Backward or Forward: Clicking the Backward or Forward button sends the play slider backward and forward skipping certain segments in the playback.
- Full Preview: Clicking the Full Preview button will maximize the Media analyzer window.
- Turn Repeat ON: Turn Repeat ON toggles with Turn Repeat OFF. If Turn Repeat ON is selected then the video will continuously plays until, you manually stops it.
- Take snapshot: Click on this button to take a Photo when playing the video recording.
- Volume: Adjust volume level of the video recording, that is currently being played.
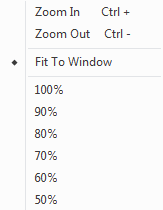
- Zoom Control: The Photo and Video files can be zoomed-in or out, allowing you to view them in different magnifications. By default, Fit To Window will be selected. Following Zoom options are provided:

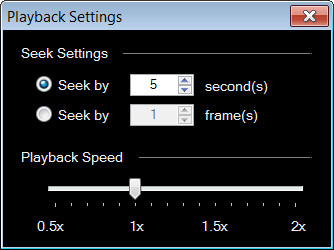
- Playback Settings

Sliding the Playback Speed Settings allows you to set the Forward or Reverse playback speed to have a quick view of recorded videos.
Seek Settings:
Seek Settings allows you to Rewind/Fast Forward through your video recording. To Rewind and Fast Forward the recording, you need to set either the number of frames or the seconds by which you want to rewind or fast forward the playback of your recording.
The default interval is set to 5 seconds or 1 frames, as shown in above Figure. You can increase or decrease the time interval to the desired number of frames or seconds. If either of the options is selected, the recording will skip the playback according to the specified duration when you click on fast forward or rewind button.
|