|
Connection Profile Panel
All profiles are listed in the Connection profile panel.
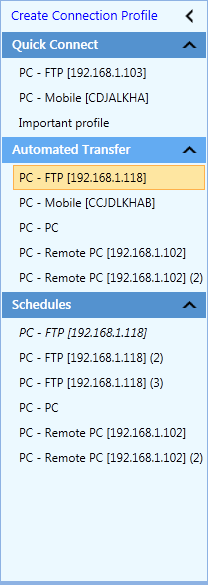
The Connection Profile panel lists all the profiles added to the application. It is composed of the following Profile sections: Quick Connect, Automated Transfer and Schedules. You can customize the Connection Profile panel by collapsing or readjusting the size of the panel accordingly.
You can perform quick operations on a profile, simply by right clicking on the profile and selecting one of the options.
|
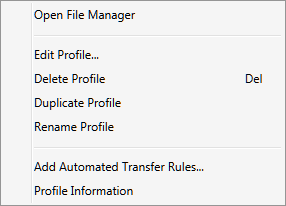
For Quick Connect Profile: |
|
|
- Open File Manager: Open connection between source and destination folders using an explorer-style File Manager.
- Edit Profile: Update the profile properties such as Connection details, name of the profile. You can also update the existing profile to an Automated Profile.
- Delete Profile: Removes the connection profile from the application.
- Duplicate Profile: Make a duplicate of the original profile.
- Rename Profile: Change the name of the original profile. You can also select the profile and press F2 to rename profile.
- Add Automated Transfer Rules: Create an automated profile with the same settings by just adding the Automated Transfer rules.
- Profile Information: Displays information of the connection profile.
|
|
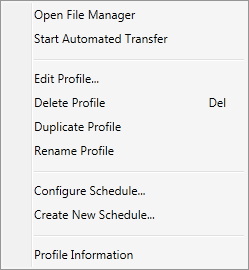
For Automated Transfer: |
|
|
- Open File Manager: Open connection between source and destination folders for the Automated Profile using an explorer-style File Manager.
- Start Automated Transfer: Open Automated Transfer Status page and start transferring the files automatically according to the rules configured for the profile.
- Edit Profile: Update the properties for the Automated Profile such as name of the profile, connection details, automated rules. You can also update the existing profile to a Quick Connect Profile.
- Delete Profile: Removes the Automated profile along with the associated schedules from the application.
- Duplicate Profile: Make a duplicate of the original profile.
- Rename Profile: Change the name of the original profile. You can also select the profile and press F2 to rename profile.
- Configure schedule: Edit the previously added schedule or add a new schedule to automate the transfer process for the selected profile.
- Create New Schedule: Create a schedule such that transfer will begin at the specified time as mentioned in the schedule.
- Profile Information: Displays information of the Automated profile.
|
|
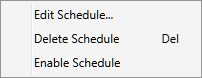
For Schedules: |
|
|
- Edit Schedule: Update the settings of the schedule.
- Delete Schedule: Removes the schedule from the application.
- Enable Schedule: In order to make the schedule active, click on the Enable Schedule option. Once the schedule is enabled then the actions specified for the schedule will be performed according.
|
|
For Connection profile panel: |
|
|
- Collapse: Collapse and expand the sections such as quick connect profiles, automated transfer and schedules in connection profile panel.
- Sort by Name: Arrange the profiles and schedules listed in connection profile panel alphabetically.
|
Note: For unregistered application, only 1 Automated Profile and first Schedule associated with the active Automated Profile will be enabled.
|