Recording a Custom Region of your PC screen
The Custom Region allows you to select a single application or a portion of your screen. This helps the viewer to focus on what you are trying to present. Using the custom region eliminates recording the unnecessary portion of the entire desktop. When you select a region, all the icons, windows, and anything visible within that Custom Region is recorded. You can work on your computer while all the desktop activities are recorded in the background.
To Record a Custom Region of the PC Screen use the following steps:
Click File >> Record >> Recording Options >> Custom Region.
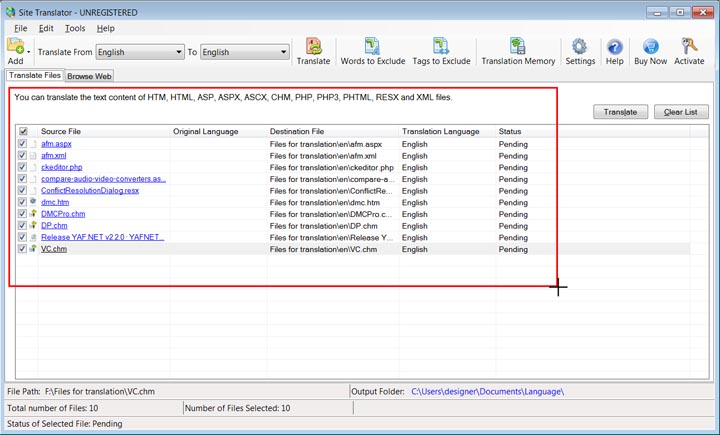
Fig 1. The Site Translator window is selected using the Crosshair.
On selecting the Custom Region option, the mouse pointer changes to a crosshair. Drag the crosshair across the desired area on your desktop to select the region of the screen to record. Record any application by clicking on its window. The dimension chosen are locked to that window region.
As you are selecting the region to record, you can see a set of dimensions listing the width and height of the capture area. In the Region Selection box you can customize the width and height of the capture dimensions.
The minimum dimensions for selecting the custom region is 150*150. Recording will not start:
If specified custom region is having less than 150*150 dimension
If Specified custom region is beyond the resolution
Region Selection
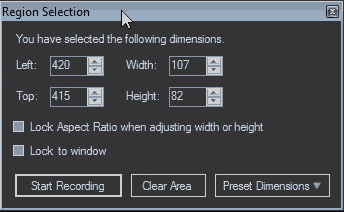
Fig 2. Region Selection
If you want the width and the height fields to be proportionally adjusted to each other, select the option Lock Aspect Ratio when adjusting width or height.
On selecting the option Lock to window, the application window resizes to stay within the recording boundaries.
If you are not sure about the dimensions, choose a fixed size from the Preset Dimensions dropdown. The recently recorded dimensions are also listed above the separator line in the dropdown. You can use this list to quickly access the last recorded dimensions.
Press Clear Area to return to the Crosshair and select a different region. After selecting a region, click Start Recording.
Enable Mouse Tracking
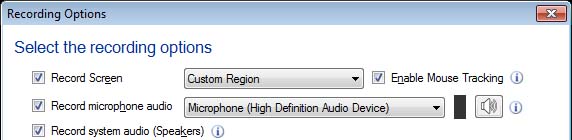
When this option is checked then selected custom region will automatically move with respect to the cursor position. It helps you to shift focus quickly from one point to another while preparing your presentations.
|