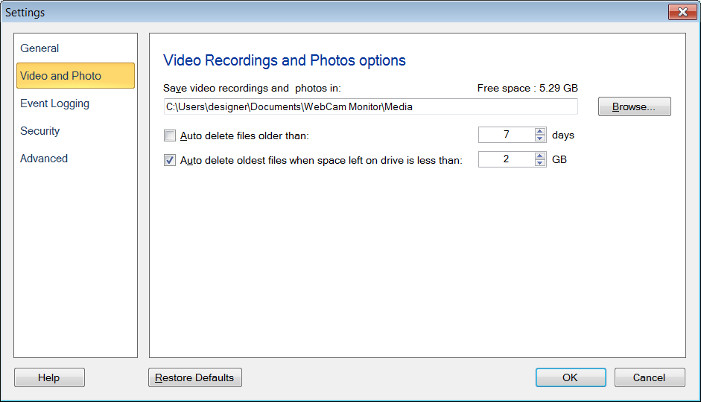
Video and Photo Settings
To configure Video and Photo Settings, click File >> Settings >> Video and Photo.

Media File Options
Save video recordings and photos in: By default, all media files such as video recordings and photos will be saved on your PC in Documents >> Webcam Monitor >> Media. You have the option to change the default folder by clicking on Browse.
Auto delete files older than n days: This method is a good choice if you know that an important file will be looked at (and copied to a new location) within a set time after it is recorded.
Auto delete oldest files if n GB left on drive: In order to avoid completely filling up a hard drive, you can choose to delete the oldest file whenever Webcam Monitor is launched, and only the set amount of free space is available.
Note: Webcam Monitor checks for auto deleting such files at launch, when settings dialog is closed and Auto delete options are checked, and every day at 03:00 AM, if it is running for 24 hours or more.
|