How To Make A Good Screen Recording
If you are trying to create a presentation and need to show what's happening on your screen, why not capture your entire screen with complete motion and add your own voice narration? My Screen Recorder is a perfect tool that allows you to record a part of screen, any window or the entire desktop. It allows you to record your desktop screen activity while you add your own voice narration.
This article provides a step-by-step explanation of how to make a good screen recording, using My Screen Recorder, from planning to actual recording.
Planning your Presentation
1. Select Audio Recording Device
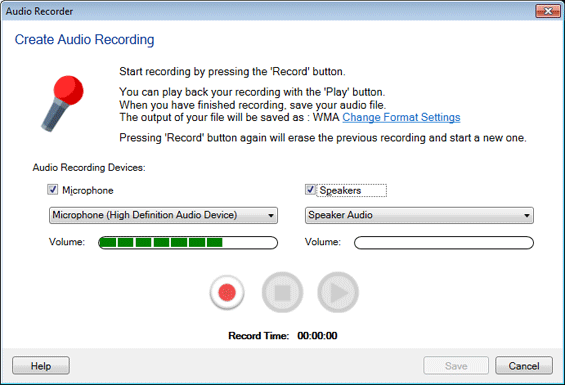
My Screen Recorder has a unique feature that allows you to capture audio from the Microphone as well as Speakers at the same time. Recording from the microphone along with the audio from the speakers allows you record Internet chat or your favorite music playing on the PC during your screen recording. The first step is to have a plan for your screen recording session.
To start with, you need to decide whether you want to add voice narration while recording or to record the sound played by the application.
If you're going to add voice narration to your screen recording, it is always a good idea to have some sort of script that helps you maintain a steady voice and pace while you record. It is a good idea to use a friendly tone of voice, even for corporate presentations. This script can also contain a list of actions like opening particular windows so you don't miss recording something important. You can pause and resume the recording at anytime by using the F8 shortcut key.
Set up the audio by clicking Tools >> Tune Audio. Select Audio Recording Devices and tune them properly by clicking the icon 

2. Selecting a Screen Recording File Format
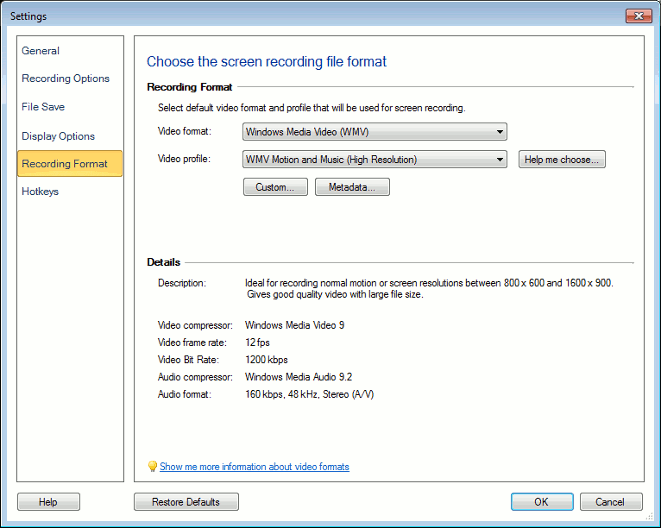
If you want the best quality videos you need to format them through few settings before you start your recordings. Click Tools >> Settings >> Format.

Select a Video format and Video Profile to store your screen recordings. My Screen Recorder can store the recordings in two file formats: WMV and AVI. By default, recordings are stored as Windows Media Video (WMV) files. This format gives smaller file sizes for any given quality setting than AVI. Generally, we recommend using AVI files only if you plan to edit or publish the recordings using another program which does not support WMV.
Use the Video Format dropdown list to pick either WMV or AVI.
Help Me Choose option is available for WMV format. There are many wmv profiles those can be used for recording. You just have to decide what contents to record [ i.e., web pages, document, videos ], the screen area to be recorded and what aspect of recording is important. Once you decide this, My Screen Recorder will automatically select a profile, that is best suited for the type of recording you want to do.
For both formats, you can pick a Video Profile. Each profile balances file size against video and audio quality. The default is WMV Motion and Music (Medium Resolution). Recordings made with this Profile are usually indistinguishable from the original screen. If file size is critical you can lower the quality, and if you need extremely high quality with very high image sizes and screen resolutions, you can increase it. Note that a lower-quality profile is likely to work well if you are recording only a small region, because there is less information to save.
3. Increasing Performance by Changing your Windows Settings
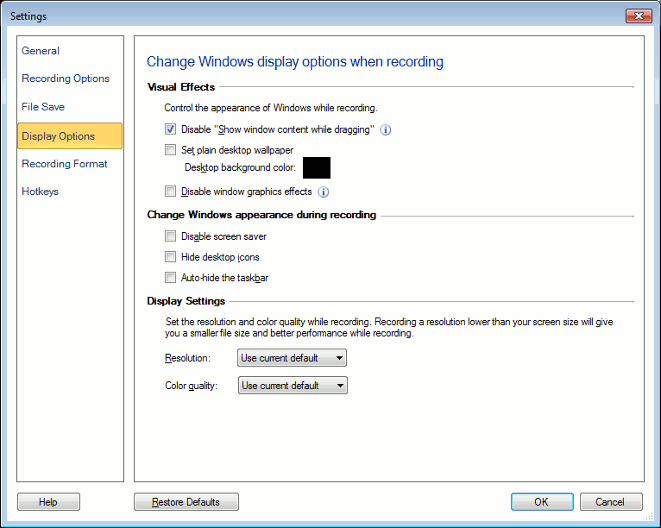
Certain factors like Visual effects, Display settings, Hardware acceleration can affect the performance of your screen recordings. To increase the performance of your Windows PC and in turn your screen recordings, you may have to fine-tune the settings.
Changing or controlling the appearance of Windows will improve the effectiveness of your screen recordings. My Screen Recorder allows you to change the Windows appearance before you begin the screen recording.
To control the appearance of Windows PC while recording, click Tools >> Settings >> Display.

Preparing to Record
You first need to decide what screen resolution to record at. High resolution recordings played back at lower screen resolutions result in image distortion. It is generally best to determine the lowest screen resolution that your recording will be played back at, and record at slightly less than that resolution. You can change your PC's screen resolution by right-clicking on the Windows desktop and then selecting Properties > Settings. Under the Settings tab, you can lower the resolution by moving the 'Screen resolution' slider to the left. If you want to increase the resolution, move the slider to the right.
The next step is to decide the recording size. If you want to capture only specific parts of your screen, click on the Region button on the tool bar, then choose either the Full Screen or Custom Region option. This reduces the file size of the recorded video.
Start Recording your Screen Activity
In My Screen Recorder, click the Record button  on the toolbar to launch the Recording Options window.
Launch the application you would like to record. To start recording, press F8 on your keyboard. Now, perform the actions you want to capture. My Screen Recorder will record them in the background. To stop the recording, press the F9 key.
Taking into consideration above all the factors and settings, capture your screen in a finest way to create an effective presentations, Tutorials and various demonstrations.
To know about Custom Region, please refer to our next article Recording a particular Area of Your Desktop Screen.