Adding Transitions to Timeline
Video Edit Magic provides over 150 transitions sorted under 24 categories. Transitions must be added to the Timeline to use them. Transitions can be added to the Transition track between the two video tracks (Video 1 and Video 2) only.
Read the article about Applying Transitions Correctly.
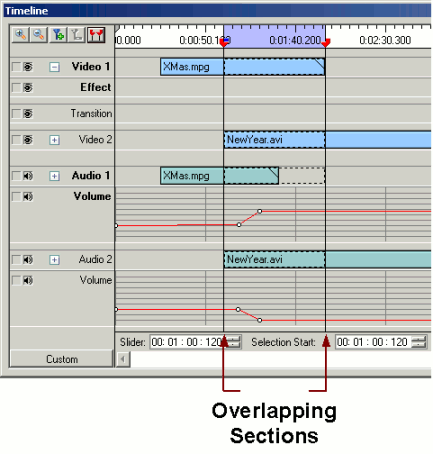
Transitions can be added anywhere to the transition track in the Timeline. However, to make them useful, you must position the transition where a source in Video 1 overlaps a source in Video 2. (If Video 1 is empty, the transition will be between Video 2 and a blank black screen. If Video 2 is empty you cannot use a transition.)
 |
| Video Transitions |
The figure given above shows the Special Wipe transition added to an overlapping section of the Timeline. The region between the selection sliders is the overlapping section.
Transitions define how source(s) in the Video 1 track combines with the source(s) in the Video 2 track.
Video Edit Magic provides two types of transitions:
- Transitions that interpolate (change) over time.
- Transitions that remain the same over time.
Most of Video Edit Magic’s transitions remain the same over time.
To add a transition:
- Select a transition category from the Video Transitions list in the Collections window.
- You may preview the selected Transition in the instant preview by clicking the Play button.
- Double-click the selected transition to add it to the Transition track corresponding to the selected video track.
You can also click Edit >> Insert at Slider Position >> Transition and select a Transition from the list.
The transition, with default settings, is added to the Transition track in the Timeline at the Seek Slider position. If the slider is positioned on an existing transition, then the selected transition is added at the end of all the existing transitions in the same track instead of the slider position. By default, a transition of one second duration is added to the Timeline. It can be resized to the desired duration. You may also add a transition by dragging the selected transition from the Video Transitions list and dropping it to the Transition Track. The Seek Slider moves to position where the transition is dropped.
The default duration of Transitions can be changed. Select Options from the Tools menu and select Source Settings and change the duration of the Transition. You can change the duration of any transition that is added to the Timeline by dragging the triangle that appears on the top right corner.
|