Using the Animated Transform Effect
The Animated Transform Video
Effect in
Video Edit Magic can be used to create
fascinating rotating
images within a video. Using this effect you
can animate your videos
from the specified
source to destination
position, specify the
number of rotations and
also choose any
background color for
your creation.
This effect grabs the
attention of
your viewers and gives a
cinematic touch to home
videos. The effect
is similar to the
"Newspaper Spin" effect
seen in feature films.
You can control the
Animated Transform
Effect using the Effect
Settings. To learn
how to apply a video
effect and open the
Effect Settings dialog, refer to our
article on
Applying Effects
Correctly.
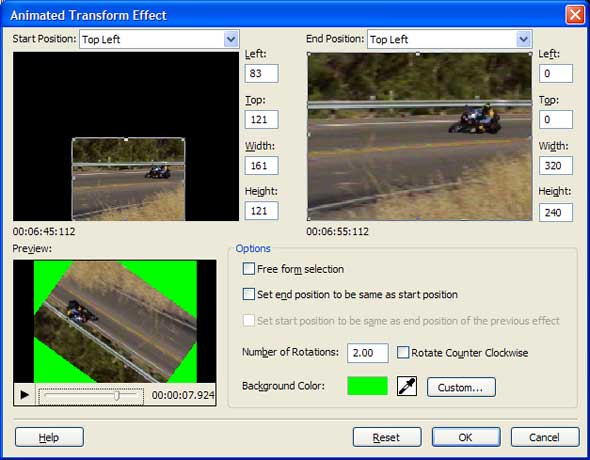
The Animated Transform
Effect has these
options:
- Start
position: This
specifies
the position
that the
video clip
starts at.
If you
choose an
off-location
screen you
can make a
video roll
into view
from the
edge of the
screen. Presets make it easy
to select
standard
locations. For
example: The Bottom Left preset
option will
start a
video clip
at the bottom
left side of
the
screen.
- End
Position: Where
the video
clip will be
when the
Animated
Transform
ends. Note
that if this
is not the
default
setting of
completely
filling the
window,
there will
be a "jump"
as the
effect ends
and the
picture does
take up the
whole
window. You
would
normally
only change
this setting
if you are
using Set
start
position to
be same as
end position
of the
previous
effect (explained
below).
- Number of
Rotations: How many
times the
clip "rolls"
during the
effect.
Raising this
number
(without
increasing
the duration
of the
effect)
means that
the clip
will spin
increasingly
faster.
If you set
the Number
of Rotations
to zero, the
clip will
simply move
across the
screen
and/or
change size,
without
spinning.
- Background
Color:
Because the
video clip
will be
smaller than
the full
screen when
it enters,
it will be
seen on a
solid-color
background.
You can use
this setting
to pick the
color. The
best
background
color is
usually one
that the
clip blends
into, often
black.
- Set
end Position
to be same
as start
position: If you
check this
checkbox,
the video
clip will
rotate in
one place,
instead of
moving
across the
screen. It
will also
remain the
same size
during the
rotation.
- Free
From
Selection:
If this
option is
unchecked,
the image
keeps the
same aspect ratio.
That is, it
stays the
same shape
throughout
the
rotations.
Checking
this options
allows you
to distort
the clip's
shape during
the Animated
Transform
(by dragging
the edges of
the
rectangles)
in the Start
Position and End
Position areas.
- Set
start
position
same as end
position of
the previous
effect:
This
checkbox is
only
available
(enabled) if
there is an
Animated
Transform
effect
already on
the Effect
Track. If
you select
this option,
the Start
Position of
the clip
will be
identical to
the End
Position set
by the
previous
Animated
Transform.
This lets
you have
multi-part
motion, for
instance
having a
video clip
enter from
one edge,
move to the
opposite
edge,
"bounce
off", and
end up in
the center
of the
window.
- Reset:
Once you
have
specified
all the
above
details and
wish to
reset them,
all you have
to do is use
this option
to undo the
settings you
applied.
The Animated
Transform effect can
also be used in
combination with video
transitions. Animated Transform is a
video effect and is
applied to a single
video track. Transitions
involve both video
tracks. Combining
the two can result in
unique visuals that
can't be achieved by
either Effects or
Transitions alone.
To explain this further
let us try to create a
Picture-in-Picture
effect using Animated
Transform effect in
combination with Chroma
Key Color transition. One of
the options under
Animated Transform
Effect is that it can
choose the location of a
video clip on screen. On
the other hand Color
transparency is the
functionality of Chroma
Key Color Transition. When
these two
functionalities are used
together let us see the
effect it has on a video
clip.
Setting up Picture-in-Picture with Animated Transform
- Add a video
clip or
still
picture to the Video 1 track.
- Add another video
clip on the Video 2 track.
- In the Collections window,
switch to the Effects tab.
- Select the Animated Transform effect and drag it to the Effect track of the
Video 2 track.
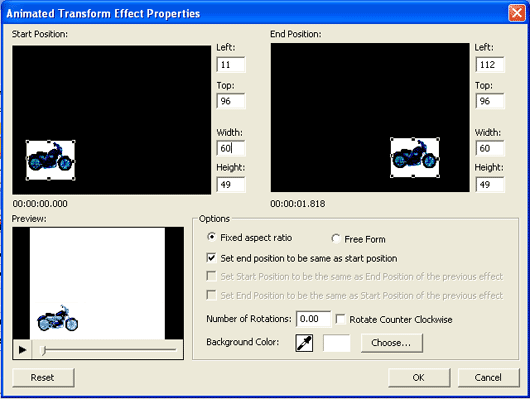
- In the Animated Transform
Effect Properties
window, set Number of
Rotations to zero.
Set the Width and Height of the Start
Position and
End Position
to 196 and
154. (This
means that
the clip
doesn't
change size
during the
effect.)
Drag the
Start
Position to
the right
edge of the
screen and
the End
Position to
the left
edge. Now
the
motorcycle
will appear
to move from
right to
left during
the Animated
Transform.
Also, set
the Background
color to
white.
- In the Collections window,
select the Transition tab.
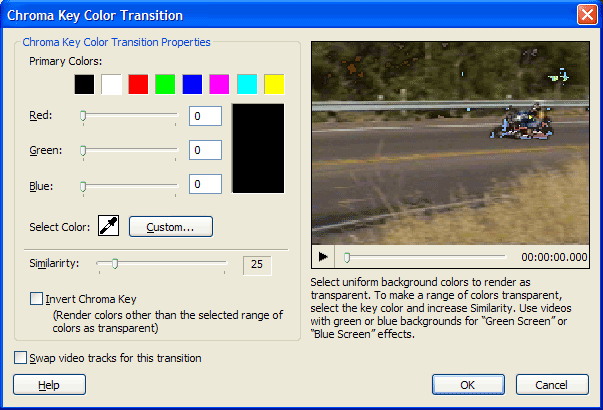
- Select the Chroma Key Color transition and drag it to the Transition track.
- Use the Chroma Key Color
Transition
properties
window specify the color that you
want to make transparent-
in this
case, white. Increase the Similarity to make
colors that
are close to
white
transparent
as well.
- Click OK.
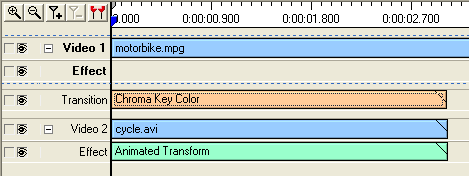
After following the steps mentioned above, the
Timeline will look like this:
The preview will look
like this:
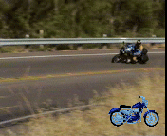
You could position the
Bike using only the
Animated Transform
effect. But by
using Chroma Key Color
the white background
behind the bike is made
transparent, and the
bike seems to be in the
road image from the
other video track--you
have combined two video
clips into one.
Combining Effects and
Transitions lets you
create unique visuals of
your own.
Video Edit Magic
provides you with a
range of Video
Transitions and video
effects. Be
creative! Combine them
to create the perfect
look for your movies.