Music Collection
The Music Collection displays all the audio files added to Auto Movie Creator. It is located at the top right corner of the workspace. When you work with files that are added to the Music Collection, the original files on the hard drive are not modified in any way.
You can open the Music Collection in several way: click on View > Music, use the Ctrl + 5 keys, or click on the Music button on the toolbar.
 |
|
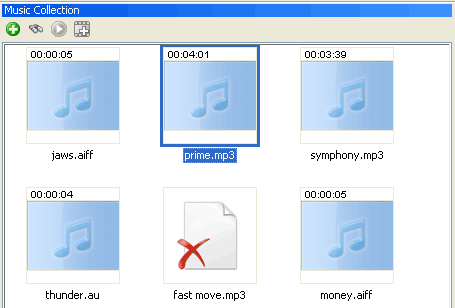
Figure 1: The Music Collection |
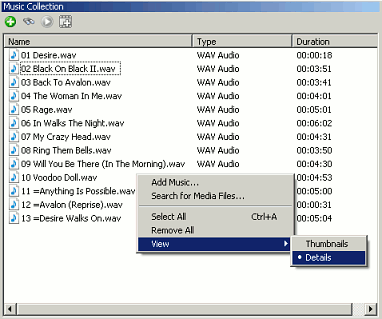
By default, the Music Collection shows Thumbnails. You can switch to a Details view by right-clicking in a blank areas of the Collection and choosing View >> Details.

|
|
Figure 1: Details View |
You can sort the listing in the Details View by clicking on any of the column titles: Name, Type, and Duration.
The Music Collection toolbar consists of four buttons. The Add Music  button lets you browse for music files and add them to the collection. The Search for Media Files button lets you browse for music files and add them to the collection. The Search for Media Files button finds all audio files in a selected folder and adds them to the collection. Click the Preview button finds all audio files in a selected folder and adds them to the collection. Click the Preview  button to play the selected file in the Preview section of the workspace. Add to Clip button to play the selected file in the Preview section of the workspace. Add to Clip  places a music file on the selected cell (the clip cell with a dark border around its edges) or the active cell (cell with a dotted line around it). places a music file on the selected cell (the clip cell with a dark border around its edges) or the active cell (cell with a dotted line around it).
You can also add files to the Music Collection by right-clicking anywhere on the white space of the Music Collection and selecting Add Music or Search for Media Files. The other option on the right-click menu are Select All and Remove All which select and remove all files in the Music Collection. You can right-click on any file to access functions like Add to Clip, Open File Location, Preview, Remove and Find Clip.
If you see a file name with the  icon, it means that the file is missing and cannot be used. To locate the file and make it available for editing again, you can right-click on it and select Find. Click Browse to specify the folder to search and click the Search button. icon, it means that the file is missing and cannot be used. To locate the file and make it available for editing again, you can right-click on it and select Find. Click Browse to specify the folder to search and click the Search button.
|