|
| Email Responder Manager: Reports |
Email Responder Manager: Reports
Email Responder creates a database of business-critical information, both about your customers and about your organization's execution in answering email. The built-in reports make it easy for you to analyze this database and understand trends, measure the performance of your employees and your department, and see how your customers are reacting to your products and services.
To create reports, switch to the Reports tab of the Email Responder Manager. A list of available reports is shown, divided into categories:
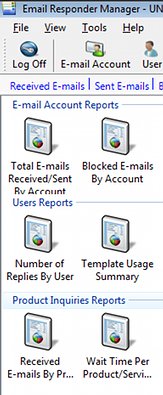
Double-click an icon to run a report.
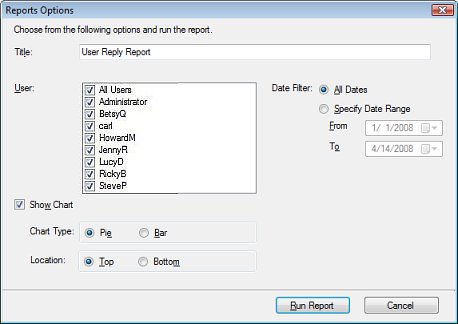
Each report has different options. Make your selections and click Run Report.
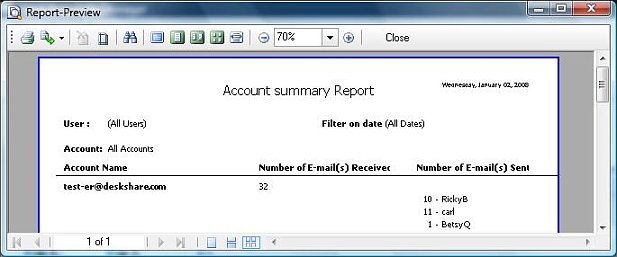
The Report Preview window appears. You can use the buttons in the tool bar as follows:
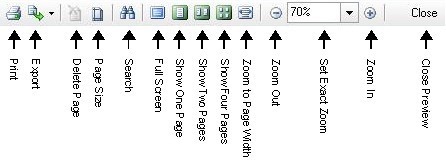
- Print: Print the report.
- Export: Save the report in one of these formats:
- Portable Document Format (PDF)
- Rich Text File (RTF)
- XML
- Microsoft Excel Spreadsheet
- Text
- Comma-Separated Values (CSV)
- Windows Bitmap (BMP)
- Graphics Interchange Format (GIF)
- JPEG
- Portable Network Graphics (PNG)
- TIFF
- Windows Metafile (WMF)
- Delete: Remove a page from the report, usually done before printing or exporting.
- Page Size: Select a paper size, such as letter, A4, or legal.
- Search: Find some specific text in the report.
- Full Screen: Remove window borders and the menu and toolbars, so that the entire screen can be used to view the report.
- Show One Page: One page of the report shows in the window.
- Show Two Pages: Two pages appear side-by-side.
- Show Four Pages: Four pages appear.
- Zoom to Page Width: The zoom is adjusted so that the width of one page fits in the window.
- Zoom Out: Reduce magnification (make the page "smaller").
- Set Exact Zoom: Type a percentage here to set the exact zoom level of the window.
- Zoom In: Increase magnification (make the page "bigger").
- Close: Click here to close the Preview window.
Six reports are available.
Email Account Reports
- Total E-Mails Received/Sent By Account: How many messages have been received from, and sent using, each email account configured in Email Responder Manager.
- Blocked E-mails By Account: Summarizes how many messages have been blocked, sorted by which email address they were sent from.
User Reports
- User Reply Summary: For each user account, reports how many replies they have sent in the given time period.
- Template Usage Summary: How many times has each template been used during the specified period?
Product Inquiry Reports
- Received E-Mails by Product/Service: How many customer inquiries have there been about each of your products and services?
- Wait Time Per Product Summary: How long did messages about each of your products and services wait in the queue before being answered, on average?
My Custom Reports
You can create your own custom reports by modifying the built-in reports. For instance, the illustration above shows a report listing only email received for and sent by the Sales Group. To create a custom report:
- Click the Tools menu and choose Make Custom Report, then pick one of the standard reports to build on. The Custom Report wizard appears:
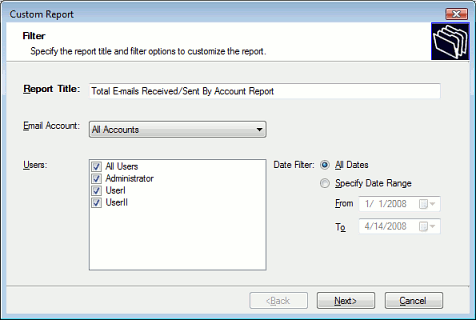
- Select options and click Next.
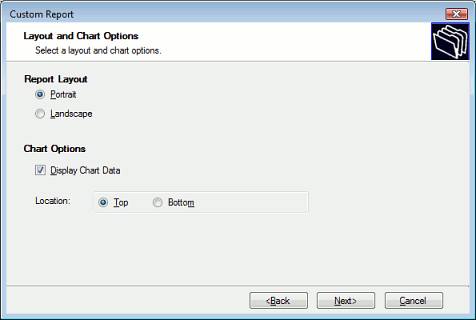
Make your selections from the second screen and click Next again.
- Type a memorable name for the report in the Save Report as area. This is what will be displayed on the Reports tab of Email Responder Manager.
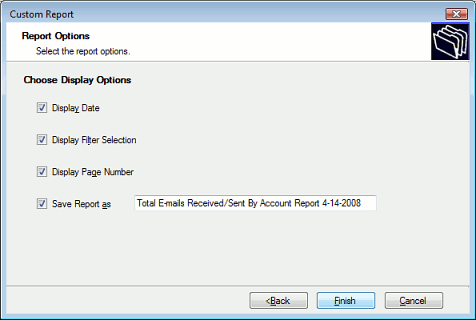
- Click Finish to create a report, and also to save your custom report.
|