| Email Responder Manager: Rules and Mail Assignment |
Email Responder Manager: Rules and Mail Assignment
One of the key time-saving and speed-enhancing features of Email Responder is that when mail is received, it is automatically and immediately assigned to either a user or group, based on analysis of its contents. This both eliminates the labor involved in assigning the message and saves the time that would have been spent waiting for a person to get around to the task.
Assignment is made on the basis of Rules, which test various aspects of a message and make decisions about assignment. Email Responder Manager is designed so that these rules can be read as English sentences, making it easy to create and understand them.
To work with Rules and mail assignment, click the Rules button. The Rules and Actions window appears:
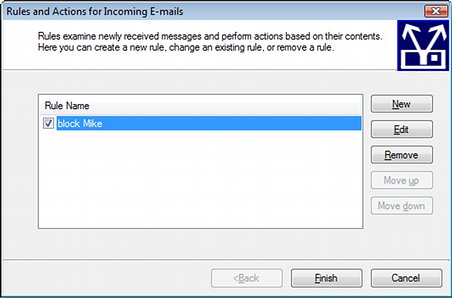
To add a rule, click the New button. Select condition for the rule screen appears:
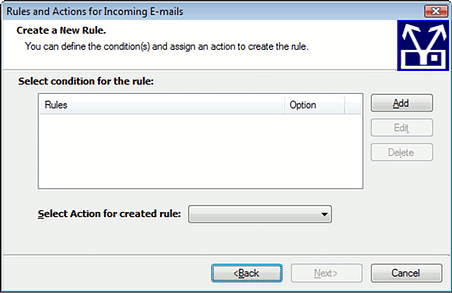
To add a rule, click Add. The Select your Condition window appears:
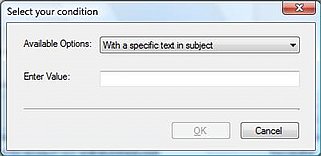
Clicking on the Available Options button causes a pop-up menu to appear, showing the conditions that Email Responder can use when assigning mail:
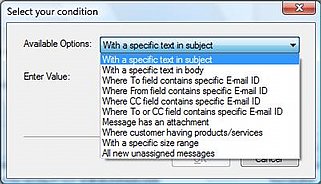
You can set the program to assign mail based on any condition. For instance, Email Responder analyzes all incoming mail to determine which product or service it is discussing. You can create a rule that will assign all email about a particular product to a specific user or group by choosing Where customer has product/service. If you choose Where customer has product/service, the bottom of the window changes to a list of your products and/or services:
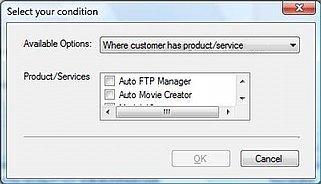
After you have selected a incoming email condition, click OK.
Complete the rule by selecting an action. The action tells Email Responder Manager what to do when the condition is met. Click the Select Action for created rule button to see the choices:

The possible actions are:
- Assign the message to a user or group
- Move the email to the Blocked Emails folder
- Delete the email
A rule can have two or more conditions. For instance, a rule might include Where the product is Auto FTP Manager and also Where the text contains the words 'Automated Transfer Profile.' If there are multiple conditions, you can choose whether to connect them with OR or AND. If you connect the two conditions above with OR, then only one condition has to be true—either the product must be Auto FTP Manager or the message must contain the key phrase "Automated Transfer Profile"—to trigger the Action. If you connect them with an AND, then both conditions must be true for the action to occur.
When you are done with the rule, click Next.
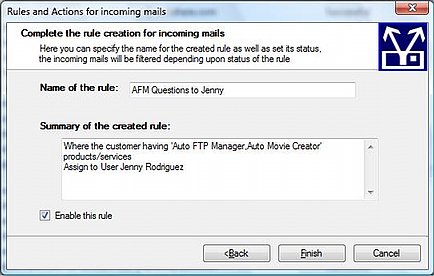
Enter a name for the rule. If you want the rule to actually be used by Email Responder Manager, select Enable this rule. Click Finish when done.
You can create as many rules as you choose. The rules are processed in the same order that you see them listed. You can change the listing order using the Move up and Move down buttons. Once an Action has been performed on an incoming email, no further rules are processed for that email.
One important type of rule is the "catchall". If you select the condition All new unassigned messages, every message that reaches this rule will be handled using the selected Action. For instance, you can assign all messages not handled by any other rule to the department manager, so that he or she can assign any messages that the rules don't anticipate. The catchall rule should always be at the bottom of the list.
For more on proper use of users, groups, and rules, read the article on our web site.
|