| Email Responder: Template Settings |
Email Responder: Template Settings
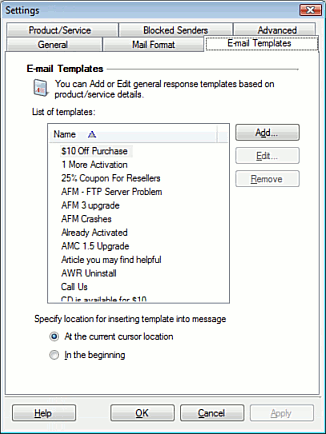
Templates let you answer questions quickly and accurately by providing pre-written responses to questions that have already been answered. The Template Settings let you create and edit Templates, and choose how Templates will be inserted into messages.

To create a Template, click Add.

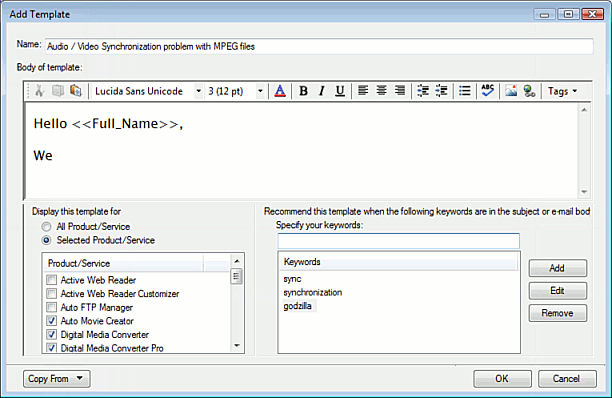
Give your template a name. Type the standard text. You can use limited formatting like boldface, italics, and underlining. The Tags drop-down list can be used to add Smart Fields to the Template, which will be replaced by the appropriate text when sending mail. For more on Smart Fields, see the Sending Mail section.
A Template can be restricted to appearing only when the message concerns a certain product or products. By listing fewer Templates, you can avoid confusion and time wasted finding the right choice in a long list. As an example, a template explaining how to configure the network proxy server would not apply to products that do not use networking. In this case, we can select Display this template for Selected Products/Services and show it only for products that do use networks. Simply check the checkboxes next to the products that the Template applies to.
NOTE: If you are using this feature, whenever you add a new product or service you should check the list of Templates and edit the ones that apply to the new product, so that they will appear in the list for messages about that product.
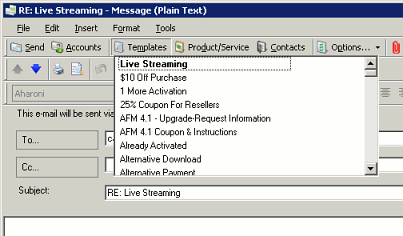
You can also configure Email Responder to recommend a particular template based on keywords present in the message. For instance, if a customer asks about "Live Streaming" or "Live Video Streaming", it would make sense to have the Live Streaming template ready. If a template is recommended, when the user clicks on Templates, the recommended Template will automatically be shown first in the list and boldface, without needing to scroll or locate it. Of course, you can still select a different Template if desired.

To add keywords, type a word or phrase into the Specify your keywords area, then click Add. To remove keywords, select the keyword in the list and click the Remove button.
When you're done creating the Template, click OK.
To edit an existing Template, select it in the list and click Change. To delete one, select it and click Remove.
The Use Default button restores the location setting (At the current cursor location or In the beginning) to the original selection. It has no effect on any Templates that have been created.
|